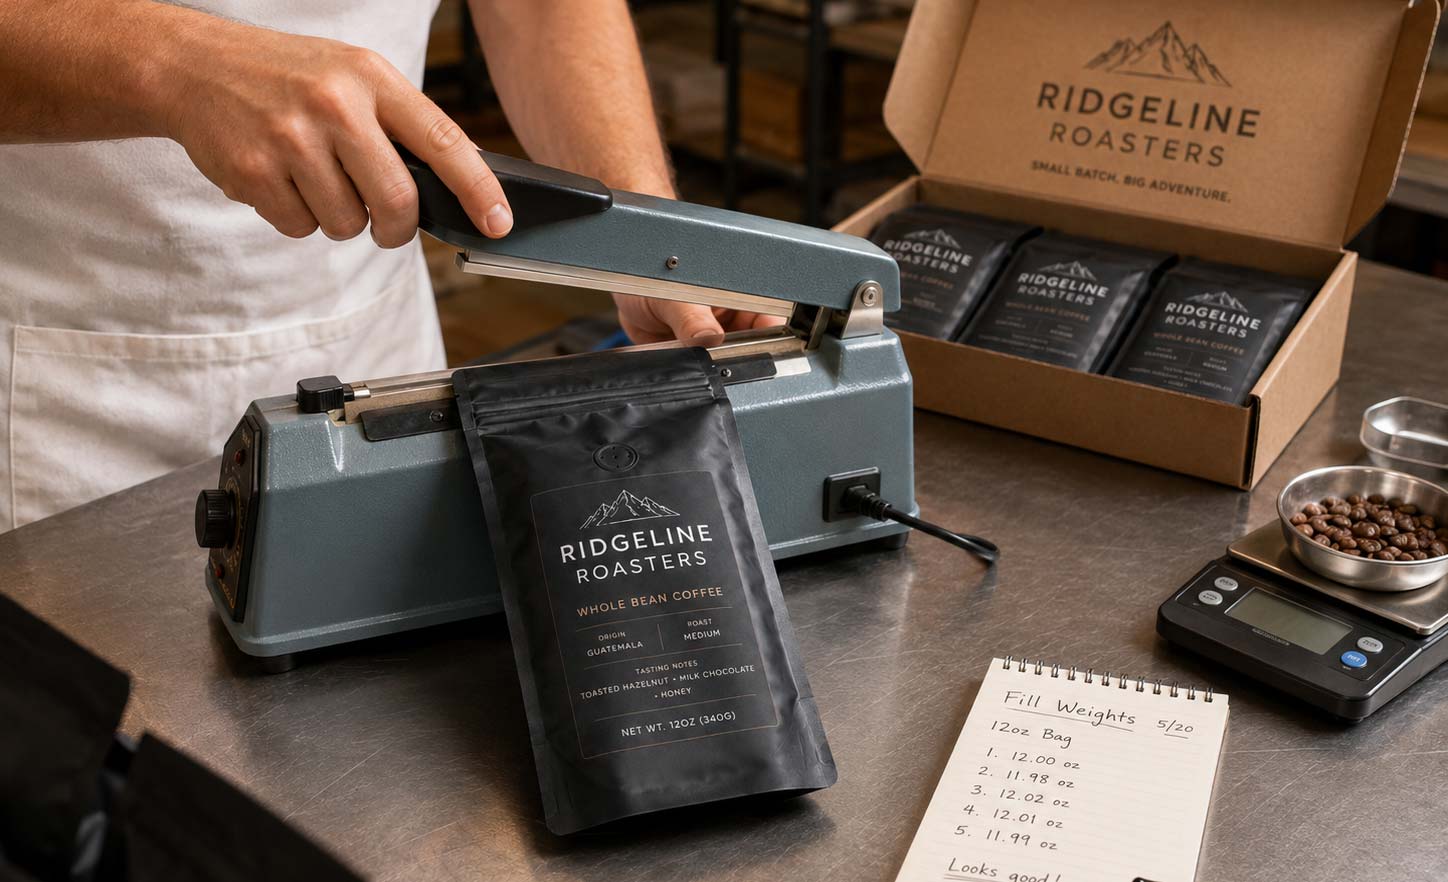
What Fill Testing Actually Is
Most roasters who are new to custom packaging focus almost entirely on the design. They think carefully about colors, logos, finish types, and valve placement. What rarely gets the same attention is whether the bag they have chosen will actually hold the amount of coffee they plan to fill it with, sealed cleanly, every single time. That is exactly what fill testing addresses.
Fill testing is the process of physically filling a sample bag with the actual product at the intended fill weight, then evaluating how the bag performs. You are checking whether the bag closes and seals correctly, whether it looks right on the shelf once filled, whether the zipper or heat seal lands in the right position, and whether the bag can survive handling, stacking, and shipping without failing. It sounds simple, but skipping this step is the root cause of a surprisingly high number of custom packaging problems.
Why Fill Weight and Bag Dimensions Are Not the Same Thing
Here is where most roasters run into trouble. A bag rated for twelve ounces of product does not automatically mean it will hold twelve ounces of your specific product cleanly. The word "ounces" refers to weight, but what matters in packaging is volume. Two products that weigh the same can occupy very different amounts of space depending on their density, grind size, and how they settle in the bag.
Ground coffee is denser and settles more compactly than whole bean. Coarse grind whole bean takes up more volume than fine grind at the same weight. Freeze-dried coffee, tea, and specialty powders each have their own density characteristics that affect how much space the fill actually occupies. A bag that handles twelve ounces of one product perfectly may look overstuffed, close poorly, or leave too much headspace when filled with a different product at the same weight.
The gap between the fill weight and the actual fill volume is the number one reason bags fail to seal correctly or present poorly once they reach the shelf.
What Happens When You Skip the Test
Roasters who skip fill testing and go straight to a full production run often do not find out about the problem until the bags are already printed and the product is being filled. At that point, the options are limited and expensive.
If the bag is too small for the fill weight, the heat seal lands in the product zone instead of the gusset, which causes the seal to fail or look puckered and weak. Bags that are overfilled do not stand upright cleanly, which hurts shelf presentation and makes it harder for customers to read the label. In the worst cases, overfilled bags burst at the seam during shipping, which damages the product and requires a repack.
If the bag is too large, the opposite problem appears. Too much headspace means the bag looks underfilled, which signals low quality to a shopper. Bags with excessive headspace also move more air with each squeeze and handling, which accelerates staling even when a one-way degassing valve is present.
Neither outcome is visible in a flat artwork proof. The only way to catch these issues before production is to fill a sample bag and check it yourself.
The Role of Bag Style in Fill Performance
The bag style you choose plays a direct role in how fill testing plays out, because different structures handle fill volume differently.
Stand-up pouches, also called doypacks, expand at the base as fill weight increases. The gusset at the bottom unfolds to accommodate the product, which means the usable volume can vary depending on how the product settles. A stand-up pouch that is slightly undersized will look fine when half-full but will not close cleanly at the intended fill weight.
Flat bottom box-bottom bags have a rigid base panel that sets the footprint from the start. They tend to give a more predictable fill performance because the bag dimensions are fixed, but they are less forgiving if the fill weight exceeds what the bag was designed for. Side-gusset bags, which are common for whole bean and bulk retail, have a different fill dynamic because the gusset is on the sides rather than the bottom.
Knowing how your chosen bag style interacts with your specific fill weight is part of what a good fill test reveals.
Custom coffee bags are not interchangeable , a spec that works for one roaster's blend at a given weight may not work for another's at the same weight.
Barrier Film and What It Has to Do With Fill Testing
There is another layer to fill testing that most roasters do not think about until they encounter a freshness problem. The barrier film your bag is made from affects how the bag handles fill pressure and how the seal performs under stress.
High-barrier multilayer films are stiffer than single-layer or low-barrier materials. A stiffer film requires more pressure to form a clean seal, which means a slightly overfilled bag is harder to seal correctly. Kraft paper bags, which pair a natural exterior with an interior barrier film, behave differently than full foil or matte-laminate bags because the outer layer has different flex characteristics.
Bags with a degassing valve also behave slightly differently when filled. The valve is there to release CO2 from freshly roasted coffee, but the valve position and the fill headspace interact. If the bag is too full and the headspace is too small, the CO2 pressure from fresh roast has nowhere to go without deforming the seal. Fill testing at the exact fill weight you plan to use, with the bag style and barrier film you have selected, is the only way to confirm this combination works together.
How to Conduct a Fill Test
The process itself is not complicated, but doing it properly requires using the actual production sample, not a mockup or a bag from a different supplier.
Start by requesting a physical sample of the bag in the exact size, style, and film spec you have ordered. Most suppliers can provide pre-production samples specifically for this purpose. Fill the sample with your actual product at the exact fill weight you plan to use in production. Do not substitute a different product or estimate with beans that are not your typical roast density.
Once filled, run the bag through your normal fill and seal process. Check whether the seal lands cleanly in the designated seal zone, above the product and below the zipper if one is present. Lay the bag flat and check for even pressure across the seal. Stand the bag upright and check whether it presents cleanly, sits level, and does not look strained or bulging. Squeeze the bag gently and check whether the zipper or seal holds without distortion.
Then subject the sample to a basic stress test. Drop it from counter height onto a hard floor. Stack several filled bags on top of each other and leave them for a few hours. Place one in a shipping box with other items and shake it. Any seal failures, gusset splits, or zipper failures that show up during this step will also show up at scale during production and shipping.
Getting the Specs Right Before You Order
Fill testing is also the step that allows you to dial in your bag specs accurately before committing to a production run. If the test reveals that your chosen bag is too small, you can adjust the bag dimensions before the plates are finalized. If the test shows too much headspace, you can step down to a smaller bag size, which is also typically more cost-effective per unit.
When working with a packaging supplier, provide your actual fill weight in ounces or grams and your fill weight in volume if you know it. Most suppliers can recommend the right bag dimensions based on this information, but confirming it with a physical fill test is always the better approach. Variables like your roast level, grind setting, and how your fill equipment packs the product all affect the real-world volume that a fill weight number alone cannot capture.
This is especially relevant when switching from
stock bags to custom production. A stock bag you have been using successfully is already validated at your fill weight. Moving to a custom bag of a different style, film, or construction requires re-establishing that validation from scratch.
Fill Testing Across Product Lines
Roasters who sell multiple SKUs at different weights need to run a fill test for each size. A twelve-ounce whole bean bag and a twelve-ounce ground bag should both be tested separately, because they do not behave the same way. A two-ounce sample bag and a five-pound bulk bag behave very differently from each other even within the same bag style family.
This is also worth thinking through for brands that produce both coffee and
food packaging items. Granola, spice blends, tea, and protein powder all have density and flow characteristics that differ from roasted coffee. A bag spec that works perfectly for coffee may not perform the same way when filled with a fine powder or a bulkier grain-based product. Each product category warrants its own fill test.
What Good Fill Test Results Tell You
A successful fill test confirms several things at once. It tells you the bag seals cleanly at your fill weight, that the presentation looks right on the shelf, and that the bag can handle the stress of shipping and stacking without failing. It also confirms that your degassing valve has adequate headspace to function correctly and that the zipper, if present, opens and reseals cleanly after the bag has been filled under production conditions.
When the fill test comes back with issues, that is also useful information. A small seal zone failure is a much cheaper problem to fix at the sample stage than at the production stage. Identifying a headspace issue before you run ten thousand units is the difference between a simple spec adjustment and a significant financial loss.
Roasters who run
digital packaging orders with lower minimum quantities have a natural advantage here. A short-run digital order can serve as a secondary fill test under production conditions, because the order quantities are low enough that adjusting specs for a follow-up run is not financially painful. A rotogravure run at high volume, by contrast, makes getting the spec right on the first attempt far more important.
A Simple Fill Test Checklist
Before signing off on a production run of any new bag spec, work through this list.
- Did you fill the sample with your actual product at your actual fill weight, not an approximation
- Did the heat seal or zipper close cleanly without product contamination in the seal zone
- Does the filled bag stand upright and present cleanly on a flat surface
- Is there adequate headspace above the fill line for the seal to land in a clean zone
- Did the bag pass a basic drop and stack stress test without failure
- If a degassing valve is present, is there enough headspace for it to function without deforming the seal
- If you are switching from a previous bag, did you test the new spec even if the dimensions look similar on paper
The Ten-Minute Step That Protects Your Entire Run
Fill testing is not glamorous. It does not show up in a design file and it does not make a good social post. But it is the single step that sits between a production run that performs exactly as expected and one that costs you money, time, and product. Getting a physical sample, filling it at weight, and checking it properly takes less time than most roasters think, and the payoff is certainty before you are committed. Nail the spec on the sample. The production run will take care of itself.